How to translate on the e.foundation website
TranslatePress is the tool we use to manage the different languages on our website.
/e/’s website is based on the WordPress Content Management System, and we use the TranslatePress plugin to manage the different content translations, as well as to manage translators’ roles and responsibilities.
As a translator, you have a WordPress account to connect to our back office with a “translator” role, meaning you have rights to add content in new languages on the website.
To connect to your back office, go to https://e.foundation/wp-admin, and log in!
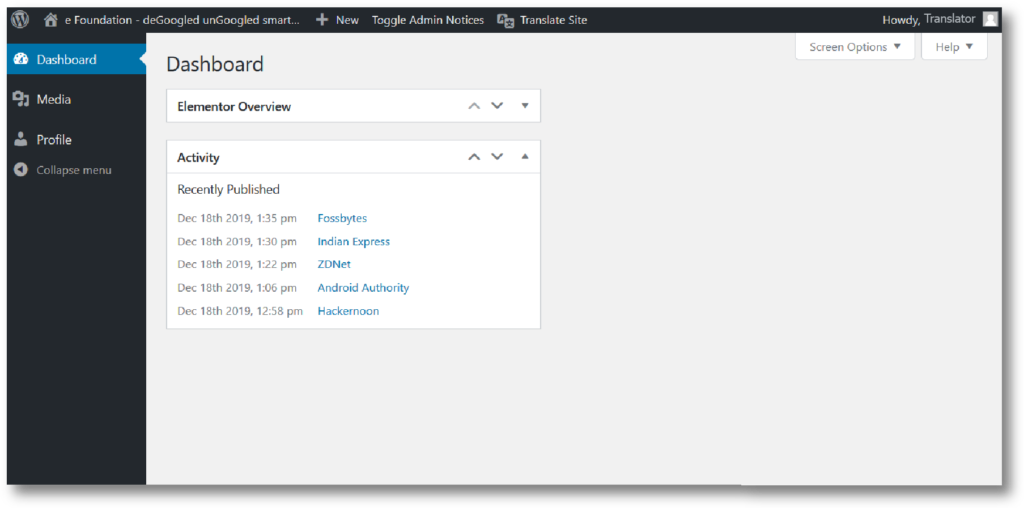
Once you log in, your back office will look like the image below.

To start translating, Click on “Translate site” in the top menu bar.

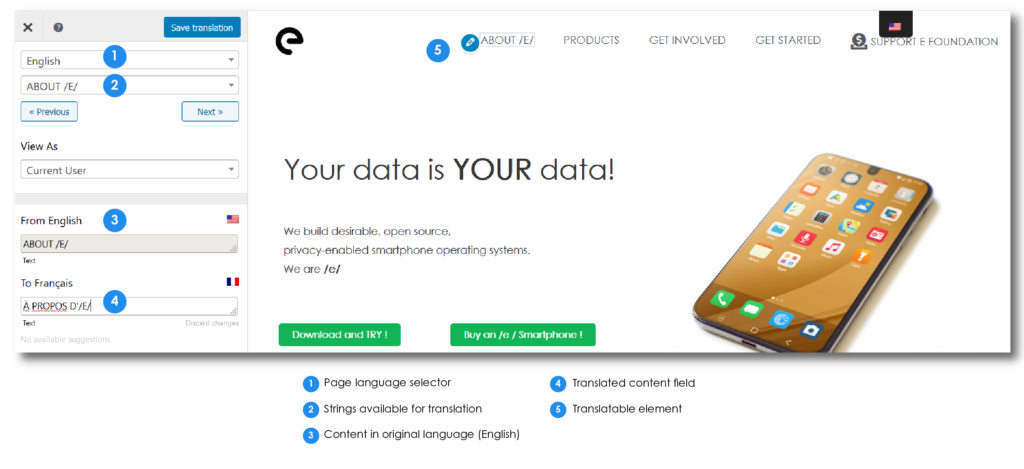
The TranslatePress interface keeps things simple, as you can see in the screenshot below.

Once you get to the translation interface, select the language you wish to translate to in the page language selector (1), and navigate the site to choose the page you wish to work on.
The blue pen logo indicates sections you can translate: text, menus, buttons, site header and footer, everything is in the same interface.
The green arrow is to translate a block in its entirety, instead of line by line. This tool is to be avoided as much as possible as it affects all languages and not just the one you are translating. It can cause content in other languages to no longer be visible.
When a sentence or block is translated don’t forget to save !
Check out this video clip to see the plugin in action!
A few pointers
- Translators cannot be restricted to one language, take care to select and edit the language you are assigned to!
- Links will be shared in the Telegram channel to access posts for translation (such as in the case of Newsletters).
- Unlike our previous tool, there is no progression bar to check a page completion. Please translate the content strings in the listed order as much as possible, so we can keep track of things. If you must leave a task mid translation, don't hesitate to drop a message about it in the Telegram channel.
- In order to offer the best possible user experience, a new language will be added only when the whole site translation is ready.
- At times, adding translated text may cause some of the site elements to overlap, if this happens, don't worry! Just send a message about it in the Telegram channel and we'll look into it.

